
More Pen Lines Using Templates
/Here are a few more ideas for decorative pen lines using the template shapes. This time, it is your turn to drive.

Brian Wolf, CPF
Art & Education Ambassador
Wizard International
The premise for the designs in the earlier article about pen lines was to use the template shapes to add the decorative elements to the pen lines. No drawing, no extra alignment steps, and no merging. Then set the parameters to very small values so that the decoration would be almost subliminal. The pen can draw these details easily and impressively. No pen line would ever need to be just a plain rectangle. The details would be delicate enough that they could not possibly overshadow any picture.
Some of the designs used the template shapes in obvious ways, some used template shapes that were not often considered because they were entirely too decorative, and one used unlikely parameter values to turn the template into an uncuttable shape, but quite an interesting pen line.
The premise for this group of designs remains the same. This time, however, there will be no files to download. The Parameter tables will be included, and you will make your own files. Either begin with the downloaded files from the earlier article, or start a new design from scratch. Education is important. How many times have we heard that expertise is the first step toward creativity?

Example of decorative pen lines created using a Wizard 9000z
Making a Beginning Decorative Pen Line Design
Here is everything necessary to design a mat with a pen line. It may even be the last mat like this you’ll design from scratch. You will save this mat and use it as a beginning for every pen line mat in your shop. All the necessary items will already be included. Open it and change the details to suit today’s project.

Here is the list of the elements in the Beginning Pen Line mat design.
There is an opening. In this example, it is a 2-layer opening. The size does not matter—it will be changed for every new project.
The Reveal is 0.125 inch. This, too, might be changed with every project.
There is a pen line. The Template shape for the pen line is 402: Classic. The top arrow points to the button that displays the Template ID. Clicking this button will open the Template Library to change the pen line’s shape.
The pen line is Attached to the opening.
Attaching Lines
Attaching is the magic that makes this beginning pen line design so efficient. When a pen line (or a V-Groove or debossed line) is attached to an opening, the opening’s size can be changed, and the pen line will automatically re-size - maintaining its specified spacing with the opening.
Here is how to Attach lines:
Select the pen line.
Click the Properties tab at the top.
Look at the Options section on the left. Click the drop-down arrow beside the Attach To field. Look at the bottom arrow in the illustration.
Select the Opening from the list that will appear. The line will become attached to the opening.
Adjusting the Distance Between the Line and the Opening
It is critical to the design to be able to fine tune the distance between the line and the opening. Change the value in the Distance field above the Attach To field.
This Distance is always measured from the innermost layer of the opening.
If you add layers to the opening, the line will remain exactly where it is with respect to the innermost layer of the opening, so you will probably need to increase the Attach Distance.
Using the Beginning Pen Line Design
Open the design and make changes to individualize it for the current project. For example: Change the size of the opening. The pen line is attached, and it will automatically re-size.
Set the correct number of Layers for the opening.
Change the sizes of the Reveals if necessary.
Change the Attach Distance if necessary. This is almost always an artistic decision.
Set the Border sizes and set the Outside size.
Change the Template for the pen line if necessary. Click the Template ID button under Options at the left. The top arrow in the illustration points to it. It currently reads 402: Classic, indicating the current template for the pen line.
The Template Library will open. Select a new template for the line just as you would choose a new template shape for an opening.
Set the Parameters for the line’s new template shape. Click the Parameters button under the Options section at the left to do this.
Before long there will be 20 designs like this to use as beginnings. Each new project will then involve selecting the best beginning design, making a few changes, and clicking the Cut button on the Wizard.
The Designs
Following are some ideas for template shapes for lines that build on the ideas from the previous article. With each design there are suggested parameter settings that have been tested.
Make these designs and save them as future beginning line designs for each particular template. It will then not be necessary to review these written suggestions each time.
Template 402
The first 2 designs use the templates exactly as the icons show them in the template library.
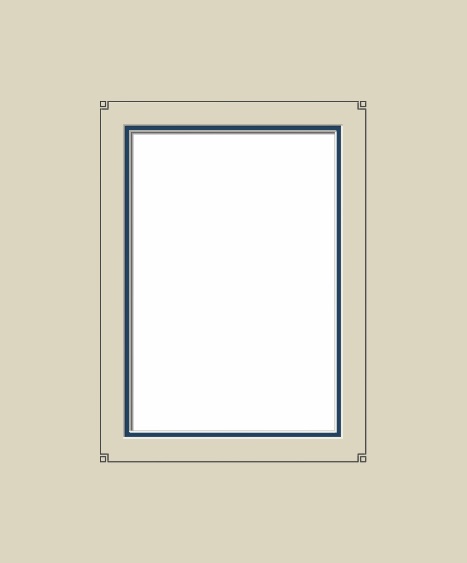
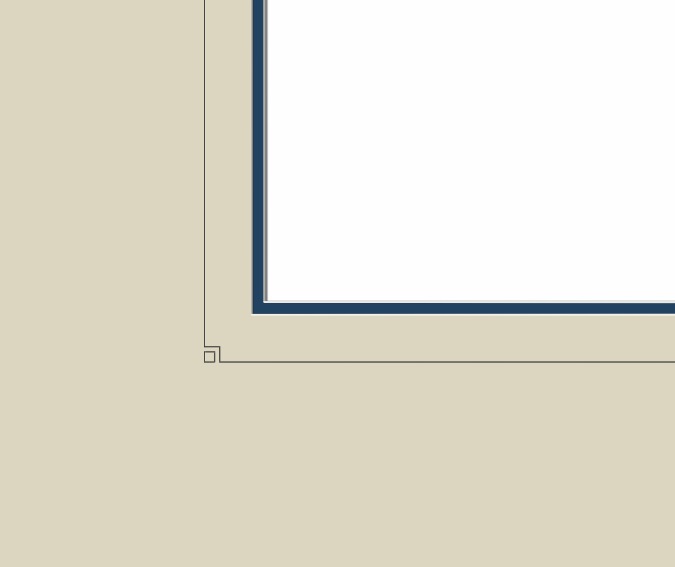
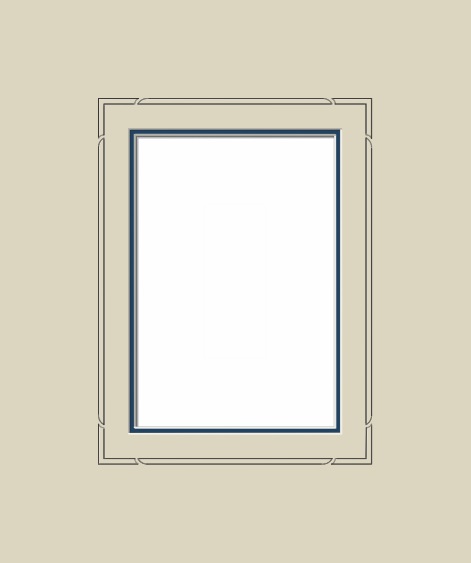
These internal rounded corners of Template 402 are a classic ornament. As with the offset corners in the previous article, it is the simplest of additions to a plain rectangular line, and it is almost always appropriate.


Parameter Settings
The Radius parameter is set to 0.09 inch.
The suggestion for a minimum radius for any arc in any template is about 0.08 inch. The machine can easily draw a smaller arc, but does the small arc still appear to be a curve when it is this small? Test and decide for yourself what this minimum should be.
The inner Reveal here – and in all these illustrations - is 0.125 inch.
The Attach Distance for this design is set to 0.625 inch. This is an artistic decision. It should be set for each project to make each picture look its best.
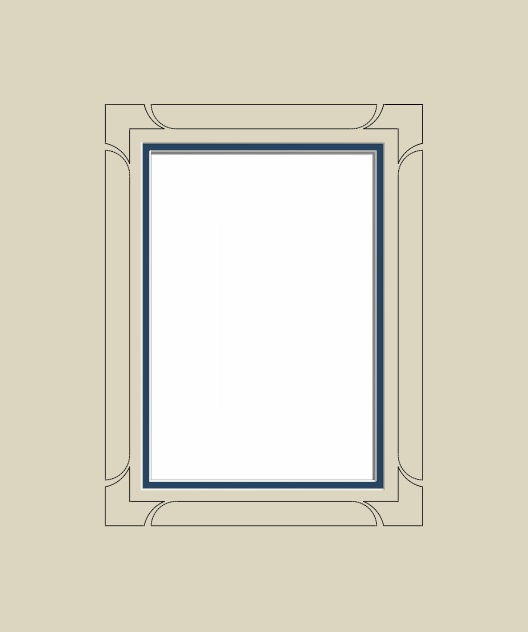
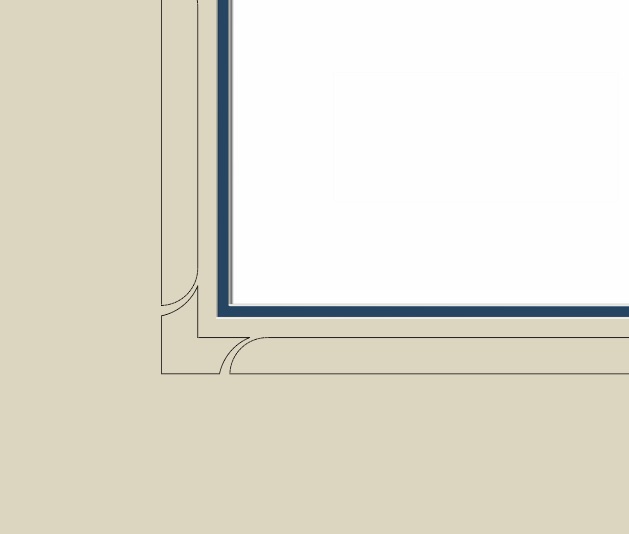
Template 205
This template is a handsome variation of the offset corner. There are small squares nestled into the offsets that make the outside of the line appear to be a rectangle.
Parameter Settings
The Size parameter is set to 0.09 inch. This parameter sets the size of the small square.
The Distance parameter is set to 0.05 inch. This parameter sets the distance between the small square and the offset portion of the line.
In this template, there are also parameters labeled A, B, C, and D. These parameters determine the treatment of each corner.
A setting of zero eliminates all decoration in the selected corner.
A setting of 1 eliminates the small outside square. The selected corner will be an offset corner.
A setting of 2 applies both the offset and the small square to the selected corner.
A, B, C, and D are all set to 2 in this design.
Templates 202, 203, and 204 can all be used to generate pen line shapes with extra elements at the corners.
Template 314
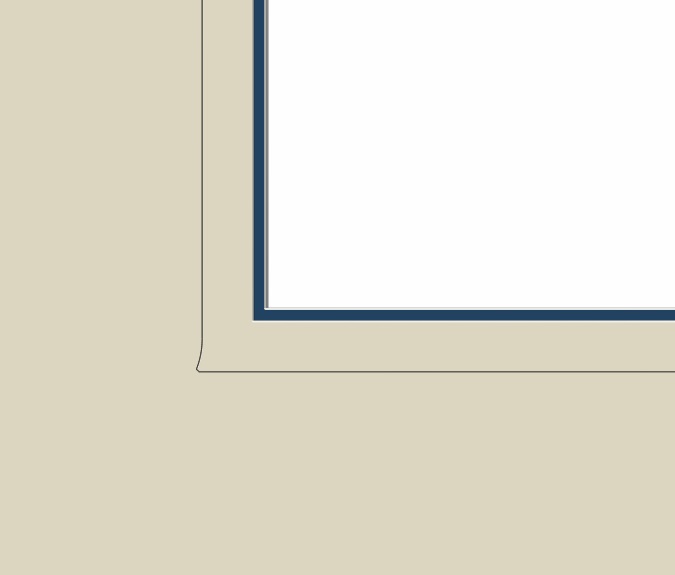
The shape of this pen line is not the exact shape of the template’s icon. Template 314 is called Camelback Flare, but this pen line’s shape has its parameters for the camelback aspects set to zero. As a result, there are only flared corners.
In the previous article about pen lines, there was an example that used unlikely parameter settings to transform a shape. Setting parameters to zero is not as daring as setting them to negative values, but you will find it to be an even more useful idea for inventing simple decorative pen line shapes in your experimentation with other templates.
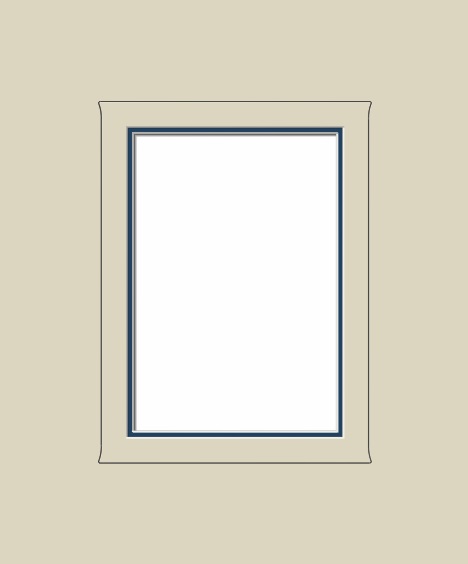
Parameter Settings
Arc Height: 0
Center Distance: 0
Side Arc Offset: 0
Chamfer: 0.04 inch
Blend Distance: 0.24 inch
Side Flare: 0.05 inch
Top and Bottom Flare: 0
The Blend Distance parameter controls how gently or abruptly the flared corners transition back into the straight sides. It is set to 0.24 inch, meaning that the curve that blends the flare back into the straight side is 0.24 inch long. Experiment with the parameters to change the sizes of the elements in all these designs.
Remember that it if you hold the Alt key on the keyboard as you click the plus and minus buttons beside the parameters, the values change by 0.01 inch (0.2mm in metric) per click - instead of the usual sixteenth of an inch (1mm in metric). This level of delicacy is crucial when the aim is to create understated decorative elements like these.
Templates 411 and 412
The original intent of Templates 411 and 412 are to design openings with decorative open grooves around them. The inner floating panels of these open grooves are tethered onto the outer mats with decorative ribbons that can be altered by adjusting the parameters.
These templates are examples of shapes that may be too lively for openings, but they offer endless possibilities for attractive decorative pen lines.
The first example uses Template 411.

Parameter Settings
Groove Offset: 1.625 inch
Groove Width: 0.09 inch
Inner Width: 0.05 inch
Inner Distance: 0.5 inch
Outer Width: 0.14 inch
Outer Distance: 0.65 inch
Attach Distance: Negative 1 inch
The Attach Distance is not in the Parameters section (review the Attaching section above), but it is important to designing these decorative lines without including the inner line that would be the “opening.”
The setting of the Groove Width makes this a closely spaced double line design with ribbons between the lines.
Remember to hold the Alt key on the keyboard as you click the plus and minus buttons to make changes. The value changes by 0.01 inch per click instead of the usual sixteenth inch.
Notes for Templates 411 and 412
In both designs using these templates, the line that would have been the “opening” inside the open groove is not part of the design. The Attach Distance is set to negative 1 inch so that the line that would have been the opening will be drawn well into the fallout of the top layer’s opening.
The Groove Offset parameter then sets the distance between the opening and the decorative line.
To move the ribbons, change the Inner Distance and Outer Distance parameters by equal amounts. The shape of the ribbons will not alter, but they will be closer to or farther from the corners. This is an important variation to accommodate larger or smaller pictures.
Template 412
The ribbons in this template flow the opposite way from those in Template 411. With this setting of the Groove Width parameter, the effect here is a double line that outlines a wider panel.
Parameter Settings
Groove Offset: 1.31 inch
Groove Width: 0.35 inch
Inner Width: 0.17 inch
Inner Distance: 0.5 inch
Outer Width: 0.1 inch
Outer Distance: 0.56 inch
Attach Distance: Negative 1 inch
The wider spacing of the lines makes this design more useful with larger pictures. Remember that it is possible - and probably a good idea quite often - to move the ribbons farther from the corners. Change the Inner Distance and Outer Distance parameters by equal amounts.
Double Pen Lines
These two previous templates introduce the idea of double pen lines. Though we still want very small details in pen lines to allow them to be used more often, the possibilities for more complex ornaments using double lines are striking.
There is an easy way to design double lines using most any template. The following design will explain the one necessary setting.
Template 213


The icon for this template shows the angles at the corners pointing outward. In this design, the Point Height parameter is set to a negative value so that they point inward.
To make a pen line (or a debossed line) into a double line, look at the illustration of the software screen at the beginning of this article. It shows the Properties of the pen line. In the Options section at the left, below the Template ID button, there is a VG Width field. In the illustration it is set to zero.
If this pen line was a normal cut V-Groove, this VG Width field would be set to zero to cut a normal closed V-Groove.
If there was a value in the VG Width field, 0.25 inch for example, it would cut as an open groove a quarter inch wide.
Entering a value into the VG Width field for a pen line generates a parallel pen line to the outside of the original. In this design the VG Width is set to 0.04 inch. The two pen lines are 0.04 inch apart - about as close as lines should be according to this test. Test on your machine, though, for a good minimum separation.
Parameter Settings
Corner Distance: 0.17 inch
Point Width: 0.13 inch
Point Height: Negative 0.12 inch
VG Width: 0.04 inch
Attach Distance: 0.625 inch
Your Turn
The examples presented here illustrate ideas that will begin your own discovery. The next step is to try these ideas using other template shapes the spark your interest. And…just because the pen tool comes from the factory supplied with a black pen, does not mean that this is the only possibility! Art supply stores are full of pens that will add variations of color and line width to your work. One hint: a most gratifying surprise was how nicely a mechanical pencil draws in the Wizard. Fitting it may be an effort, but it is such a widely applicable variation.
Pen lines were the first idea in all of mat decoration. Now that technical assistance has replaced practiced hand work, they are efficient enough to become a part of your everyday work. With the ability to add individualized decorative touches to every line, customers will be impressed.
